
 Kia Sorento: Intake Manifold Removal and Installation
Kia Sorento (XM, 2011-2015) Service Manual / Engine Mechanical System / Intake And Exhaust System / Intake Manifold Removal and Installation
| 1. |
Disconnect the battery negative terminal.
|
| 2. |
Remove the air cleaner assembly.
(Refer to Intake And Exhaust System - "Air Cleaner")
|
| 3. |
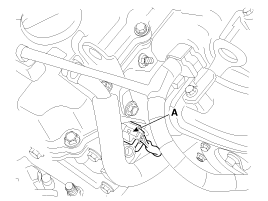
Disconnect the intake OCV (Oil control valve) connector (A).
|
| 4. |
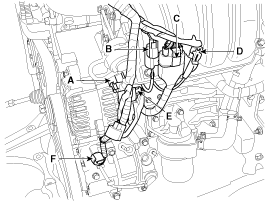
Disconnect the VIS (Variable intake system) connector (A), the OPS (Oil
pressure switch) connector (B), the injector extension connector (C),
the knock sensor connector (D), the alternator connector (E) and the
air compressor connector (F).
|
| 5. |
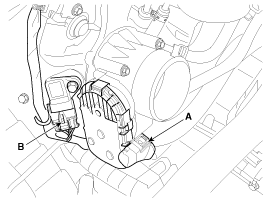
Disconnect the ETC (Electronic throttle control) connector (A) and MAPS
(Manifold absolute pressure sensor) & IATS (Intake air temperature sensor)
connector (B).
|
| 6. |
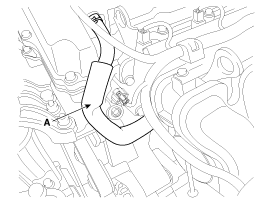
Disconnect the PCV (Positive crankcase ventilation) hose (A).
|
| 7. |
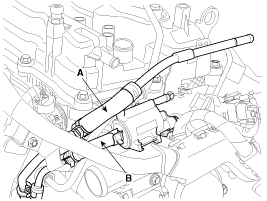
Disconnect the vacuum hose (A) and PCSV (Purge control solenoid valve)
hose (B).
|
| 8. |
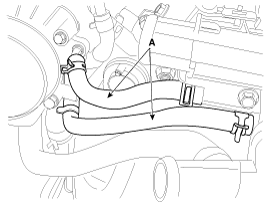
Disconnect the throttle body coolant hoses (A).
|
| 9. |
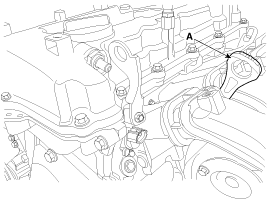
Remove the oil level gauge (A).
|
| 10. |
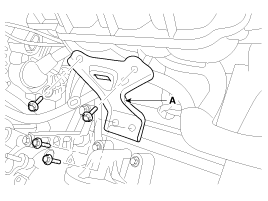
Remove the intake manifold stay (A).
|
| 11. |
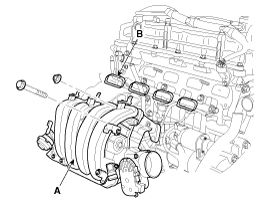
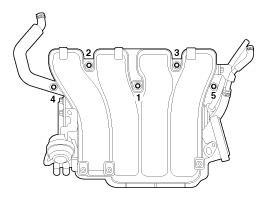
Remove the intake manifold (A) with the gasket (B).
When installing the intake manifold, tighten the bolts and nuts with
pre-torque first, and then tighten the bolts and nuts with specified
torque in the sequence shown.
|

| 12. |
Install in the reverse order of removal.
|
1. Intake manifold assembly
2. Electronic throttle body
3. Intake manifold stay
4. Intake manifold gasket...
 Intake Manifold Components
1. Heat protector
2. Exhaust manifold
3. Exhaust manifold gasket
4. Exhaust manifold stay...
 Exhaust Manifold Components
See also:
Engine compartment. Maintenance services
Engine compartment
The actual engine compartment layout in your specific Kia Sorento model may differ slightly from the provided illustration based on regional specifications.
...
Inspection
[Evap Leak Test]
Engine Control Module (ECM) controls Purge Control Solenoid Valve (PCSV)
and Canister Close Valve (CCV) for EVAP System diagnosis if the conditions are
satisfied ...
Curtain Airbag (CAB) Module Installation
1.
Remove the ignition key from the vehicle.
2.
Disconnect the battery negative cable and wait for at least thirty
seconds.
...
Manuals list
- Kia Sorento MQ4 2021-2026 Owners Manual
- Kia Sorento XM 2011-2015 Owners Manual
- Kia Sorento XM 2011-2015 Service Manual

Copyright © xm.ksmanual.com 2014-2026 - 0.0421