
 Kia Sorento: Exhaust Manifold Removal and Installation
Kia Sorento (XM, 2011-2015) Service Manual / Engine Mechanical System / Intake And Exhaust System / Exhaust Manifold Removal and Installation
| 1. |
Remove the engine cover.
|
| 2. |
Disconnect the battery negative terminal.
|
| 3. |
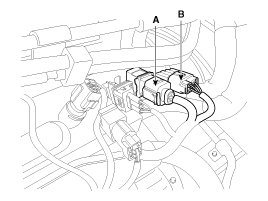
Disconnect the front oxygen sensor connector (A) and the rear oxygen
sensor connector (B).
|
| 4. |
Remove the front muffler.
(Refer to Intake And Exhaust System - "Muffler")
|
| 5. |
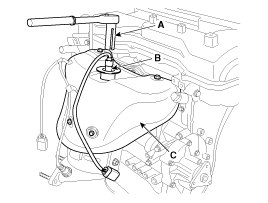
Remove the heated oxygen sensor (A).
(Refer to Engine Control/Fuel System - "Heated Oxygen Sensor (HO2S)")
|
| 6. |
Remove the exhaust manifold heat protector (B).
|
| 7. |
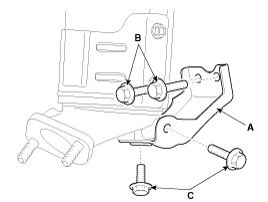
Remove the exhaust manifold stay (A).
|
| 8. |
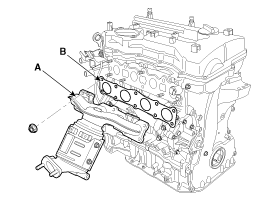
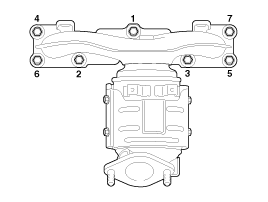
Remove the exhaust manifold (A) with the gasket (B).
When installing the intake manifold, tighten the nuts with pre-torque
first, and then tighten the nuts with specified torque in the sequence
shown.
|

| 9. |
Install in the reverse order of removal.
|
1. Heat protector
2. Exhaust manifold
3. Exhaust manifold gasket
4. Exhaust manifold stay...
 Exhaust Manifold Components
1. Front muffler
2. Catalytic converter
3. Center muffler
4. Main muffler
5. Gasket
6. Hanger...
 Muffler Components
See also:
Anti-lock Brake System (ABS)
The Anti-lock Brake System (ABS) engineered into your Kia Sorento is designed to help prevent the wheels from locking
up during hard braking so that vehicle stability is preserved and you can mai ...
Front Radar Specification
Specification
Item
Specification
Rated voltage (V)
11.5 - 12.5
Operating voltage (V)
9.0 - 1 ...
Front Wheel Transfer Assembly Installation
1.
Install in the reverse order of removal.
1.
...
Manuals list
- Kia Sorento MQ4 2021-2026 Owners Manual
- Kia Sorento XM 2011-2015 Owners Manual
- Kia Sorento XM 2011-2015 Service Manual

Copyright © xm.ksmanual.com 2014-2026 - 0.049