
 Kia Sorento: Rear Seat Replacement
Kia Sorento (XM, 2011-2015) Service Manual / Body (Interior and Exterior) / Seat & Power Seat / Rear Seat Replacement
| Rear Seat Assembly Replacement |
[Second row seat assembly]
| 1. |
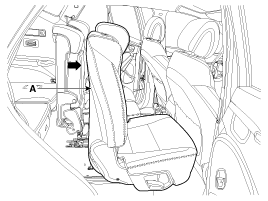
Push the second row seat assembly [RH] (A) towards the front of
the vehicle as far as possible.
|
| 2. |
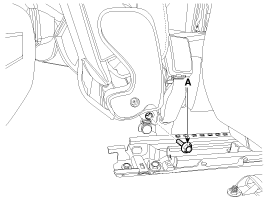
Loosen the second center seat belt buckle mounting bolt (A).
|
| 3. |
Push the second row seat assembly towards the front of the vehicle
as far as possible.
|
| 4. |
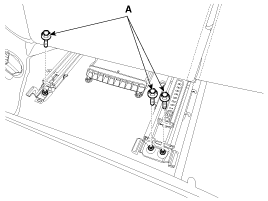
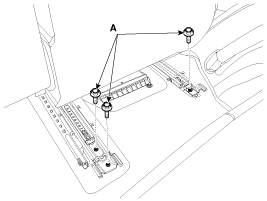
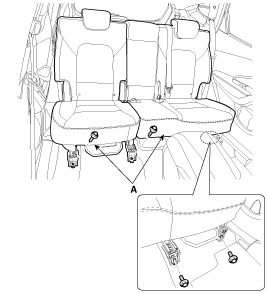
Loosen the second row seat assembly rear mounting bolts (A).
[LH]
[RH]
|
| 5. |
Push the second row seat assembly towards the rear of the vehicle
as far as possible.
|
| 6. |
After loosening the mounting bolts, then remove the second row
seat assembly (A).
|
| 7. |
Install in the reverse order of removal.
|
[Third row seat assembly]
| 1. |
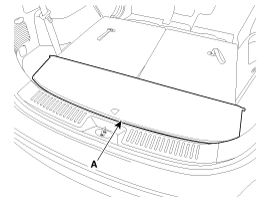
Remove the luggage box trim (A).
|
| 2. |
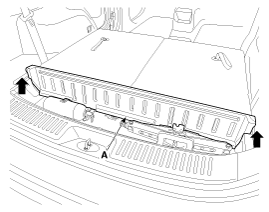
Remove the luggage box partition trim (A).
|
| 3. |
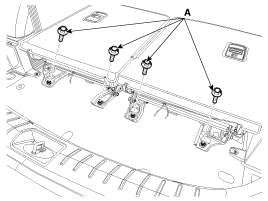
Loosen the third row seat assembly rear mounting bolts (A).
|
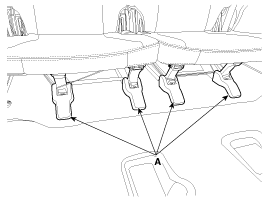
| 4. |
Remove the third row seat track mounting cover (A).
|
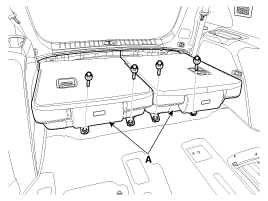
| 5. |
After loosening the mounting bolts, then remove the third row
seat assembly (A).
|
| 6. |
Install in the reverse order of removal.
|
| Rear Seat Back Cover Replacement |
[Second row seat assembly]
| (LH) |
Seat Assembly Replacement
1.
Remove the seat assembly mounting cover.
2.
After loosening the seat assembly mounting bolts, remove the seat
...
...
See also:Shift Cable Removal Dual clutch transmission (DCT) (Shift Lever): (if equipped) Installation Manuals list

Copyright © xm.ksmanual.com 2014-2026 - 0.0514
|

 Front Seat Replaccement
 Seat Belt