
 Kia Sorento: Installation
| 1. |
Check that the shift lever is placed in the "N" position
|
| 2. |
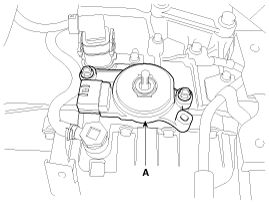
Install the inhibitor switch (A).
|

| 3. |
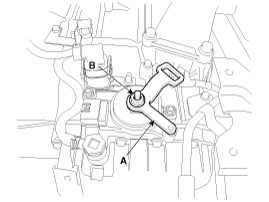
Install the manual control lever (A).
|
| 4. |
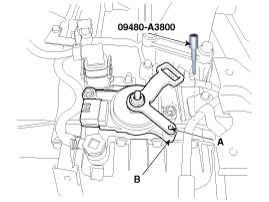
Align the hole (A) in the manual control lever with the "N" position
hole (B) of the inhibitor switch and then insert the SST inhibitor switch
guide pin (09480-A3800).
|
| 5. |
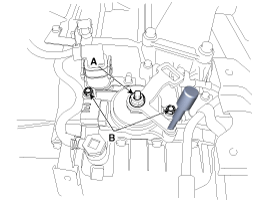
Tighten the nut (A) and bolts (B) with the specified torque.
|
| 6. |
Remove the SST (09480-A3800) from the hole.
|
| 7. |
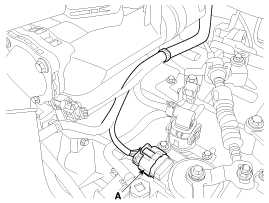
Connect the inhibitor switch connector (A).
|
| 8. |
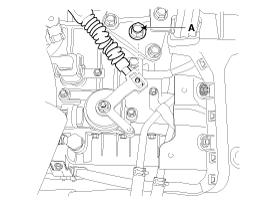
Install the shift cable by tightening nut (A).
|
| 9. |
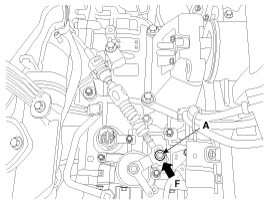
Push the shift cable to the arrow "F" to eliminate free play and
then tighten the nut (A) with the specified torque.
|
| 10. |
Install the battery and battery tray.
(Refer to Engine Electrical System - "Battery")
|
| 11. |
Install the air cleaner assembly.
(Refer to Engine Mechanical System - "Air cleaner")
|
1.
Place the shift lever into the "N" position.
2.
Remove the air cleaner assembly.
(Refer to Engine Mechanical System - "Air clean...
 Removal
1. Shift lever mounting bolt
2. Shift lever assembly
3. Shift cable assembly
4. Shift lever knob & boots assembly
5. Manual control lever
6. Retainer...
 Shift Lever Components
See also:
Removal
1.
Turn the ignition switch OFF and disconnect the negative (-) battery
cable.
2.
Disconnect the accelerator position sensor connector (A). ...
Side Body A
* These dimensions indicated in this figure are actual-measurement
dimensions. [ Unit : mm (inch) ]
...
Front Wiper Motor Installation
1.
Install the wiper motor.
2.
Install the crank arm.
Torque :
12.7-17.6Nm (1.3-1.8, kgf.m, 9.4-13.0 lbf. ...
Manuals list
- Kia Sorento MQ4 2021-2026 Owners Manual
- Kia Sorento XM 2011-2015 Owners Manual
- Kia Sorento XM 2011-2015 Service Manual

Copyright © xm.ksmanual.com 2014-2026 - 0.0345