
 Kia Sorento: CVVT & Camshaft Installation
Kia Sorento (XM, 2011-2015) Service Manual / Engine Mechanical System / Cylinder Head Assembly / CVVT & Camshaft Installation
| 1. |
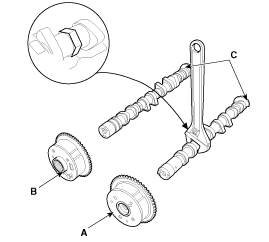
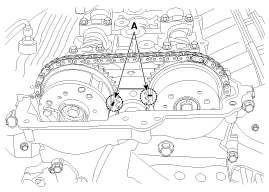
Install the intakeCVVT assembly(A), exhaust CVVT assembly(B) and camshaft(C).
|

| 2. |
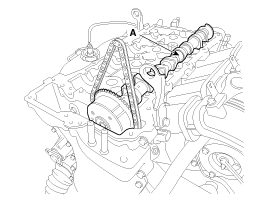
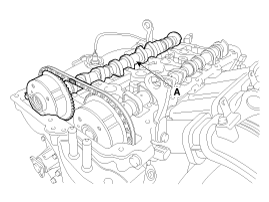
Install the camshafts.
|
| 3. |
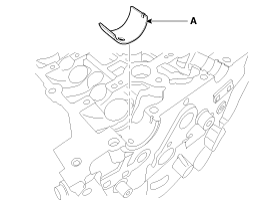
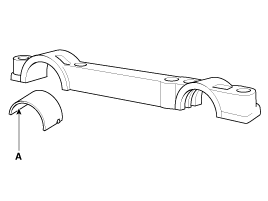
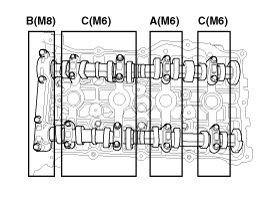
Install camshaft bearing caps (A) in their proper locations.
Tightening order
Group A → Group B → Group C.
|
| 4. |
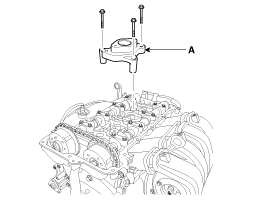
Install the high pressure fuel pump(A).
|
| 5. |
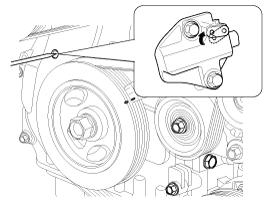
Install the ratchet of the timing chain tensioner by pushing the link
up using a thin rod.
|
| 6. |
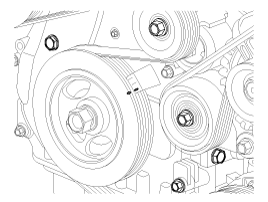
Install the service hole bolt of the timing chain cover.
|

| 7. |
Install the cylinder head cover.
(Refer to Cylinder Head Assembly - "Cylinder Head Cover")
|
Continuously variable valve timing (CVVT) Assembly
1.
Inspect the CVVT for smooth rotation.
(1)
Clamp the camshaft using a vise. Be carefu...
 CVVT & Camshaft Inspection
1. Cylinder head
2. Intake OCV (Oil Control Valve)
3. Exhaust OCV (Oil Control Valve)
4. MLA
5. Retainer lock
6. Retainer
7. Valve spring
8. Valve stem seal
9. Valve...
 Cylinder Head Components
See also:
Blind Spot Detection Unit Inspection
BSD Unit Alignment
To sense the cars exactly in the next lane with the radar, the direction
of the sensor and the direction of the vehicle have to align.
This is BSD unit alignm ...
Curtain air bag. Air bag collision sensors
Curtain air bag
Curtain airbags are installed securely along both interior roof rails, stretching overhead above the front and rear
entry doors of the cabin.
...
Removal
1.
Turn the ignition switch OFF and disconnect the battery negative
(-) cable.
2.
Release the residual pressure in fuel line.
(Refe ...
Manuals list
- Kia Sorento MQ4 2021-2026 Owners Manual
- Kia Sorento XM 2011-2015 Owners Manual
- Kia Sorento XM 2011-2015 Service Manual

Copyright © xm.ksmanual.com 2014-2026 - 0.0321